


Introduction:
In today’s fast-paced world, automation plays a crucial role in streamlining tasks and improving efficiency. With tools like Jenkins, we can automate various processes, including communication tasks like sending emails and SMS. In this guide, we’ll walk through the steps to create a Jenkins job that sends email messages automatically.
Prerequisites:
Before diving into the tutorial, make sure you have the following:
Jenkins installed and configured on your system.
Python
STEP 1:- CREAT PYTHON CODE
I’m using python for sending the email, you can use any programing language for creating this program .
If our email is sent then the out put will be show as Email sent successfully
Sender_Email= ****kunal433@gmail.com
Sender_password= Gmail app pass
Recipient_email= email of the recipient
Subject= Test Email
body= This is a test email sent from python code, using jenkins !!!
you will be receiving the email by this subject and body we will see it in the end to cross check

STEP 2:- PUSH THE CODE TO GITHUB
Remember you have to create the code in directory and initlize it with git so we keep track on it, and then we push the code to the githube repo.
This is the repo from where the jenkins will pull the code and download it

Code was successfully pushed to our repository


STEP 3:- Create job in Jenkins
You have to create a job in jenkins, click on the new item and write the name of the job select freestyle project and save it

STEP 4:- Set the Github repo
In the GIT, you have to paste the repo on which you have pushed your code, and then you have to select the branch on which your code was pushed, my code was pushed on the master brach so im specifying master

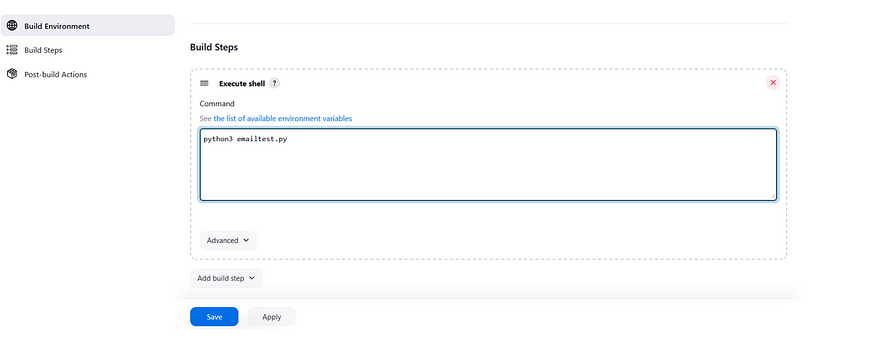
STEP 5:- Set the shell script
My base os has python installed, jenkins will be needed python program to run the application , if you don’t have python installed on your system then you’ve to install first to run your program.
After typing the command save it.

STEP 6:- Run the Build
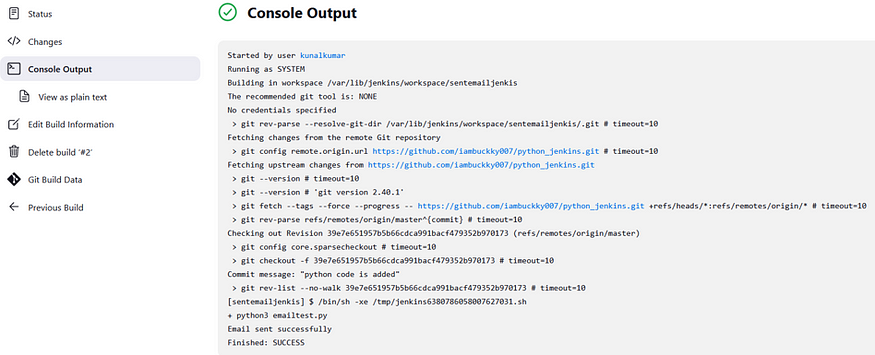
Click on the Build now to run your job and see the console output to see the logs.
Our code was successfully downloaded and then with the help of python we execute our application, we can see at the last of the out put written
Email Sent successfully

STEP 7:- Check Email
You can see here the email is successfully received. Cross check the mail and the subject and body in the python code it’s match. We have successfully sent the email using jenkins .

Conclusion:
By creating a Jenkins job to send email , you can automate communication processes and ensure timely delivery of important messages. This not only saves time but also reduces the chances of human error. Experiment with different configurations to suit your specific use case and maximize the benefits of automation in your workflow.