

TABLE OF CONTENTS
1. GitHub Webhooks
1.1. How to create Webhooks?
1.2. Why Webhooks?
2. Jenkins CI/CD Project
2.1. Task 1: Run the project using dockerfile
2.2. Task 2: Run the application using docker-compose.
In this blog, I will discuss GitHub WebHooks and an end-to-end Jenkins CI/CD project to continuously integrate and deploy a node.js application. Cherry on the cake: You can include this in your resume as proof of your Jenkins skills!
Before I directly jump into the project, let’s understand what Webhooks are.
1. GitHub Webhooks
Webhooks allow you to build or set up integrations that subscribe to certain events on GitHub.
Webhooks allow you to automate workflows and integrate your repositories with external services. When certain events occur, such as a push to a repository or the creation of a new issue, GitHub can send an HTTP POST payload to a specified URL endpoint.
1.1. How to create Webhooks?
To create a GitHub webhook:
Go to the settings page for your repository.
Click on the “Webhooks & Services” tab.
Then, click on the “Add webhook” button.
In the webhook configuration, you will need to provide the following information:
Payload URL: This is the URL that will receive the webhook notifications.
Events: Select the events that you want to be notified about.
Secret: This is a secret key that will be used to verify the authenticity of the webhook notifications.
5. Once you have configured the webhook, click on the “Create webhook” button.
1.2. Why Webhooks?
To stay up-to-date on changes in your applications.
To automate tasks.
To improve security.
Now comes the interesting part of the blog. The CI/CD project. Let’s go!
2. Jenkins CI/CD Project
Project Explanation: I am going to continuously integrate and deploy a Node JS application on Docker using Jenkins and GitHub Integration.
This project is inspired and learned from Shubham Londhe. The link to the live project deployment is CI/CD project using Jenkins and GitHub Integration by Shubham Londhe.
The repository link used for this project is https://github.com/mudit097/node-todo-cicd.
2.1. Task 1: Run the project using dockerfile
Come let’s jump into the project:
- Log in to the AWS Console. Open the EC2 service and create an EC2 Instance.
Here’s a detailed explanation of how to create an EC2 instance.
Connect to the EC2 instance.
Install Docker, Docker-Compose, Java, and Jenkins in your system.
In my previous blogs, I have explained how to install these. Here are the links to the same: Install Docker, Install Docker-Compose, Install Java, and Jenkins.
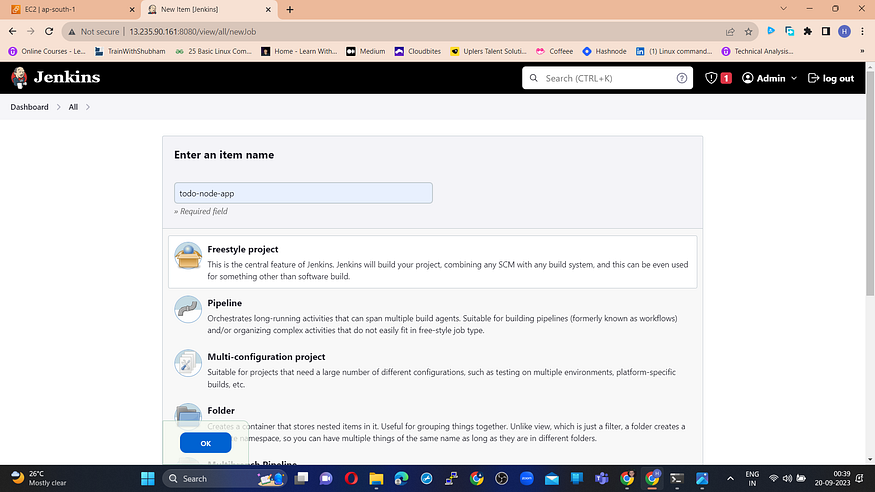
- Once Jenkins is installed, Open port 8080 to your system in the AWS console. Log in to the Jenkins dashboard and create a freestyle Pipeline named “todo-node-app”.
Here’s a step-by-step guide on how to create a Freestyle Pipeline in Jenkins!
- Go to Configure, in the General section > Type the project description you want.
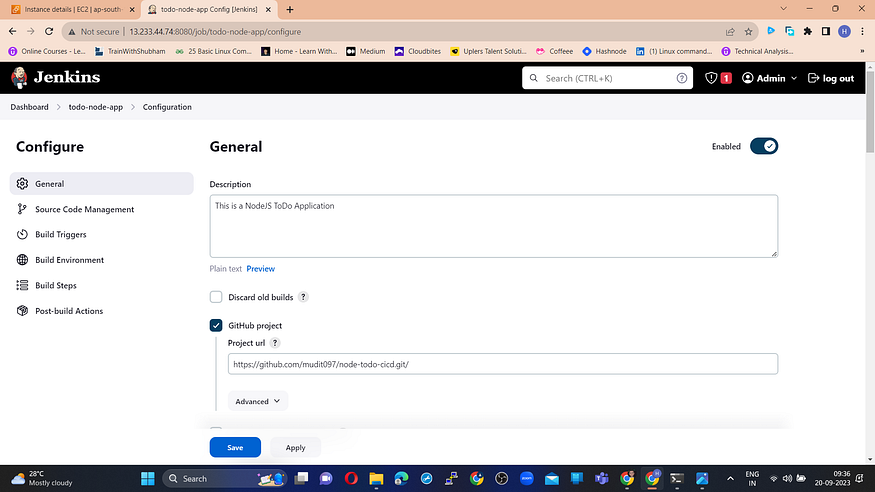
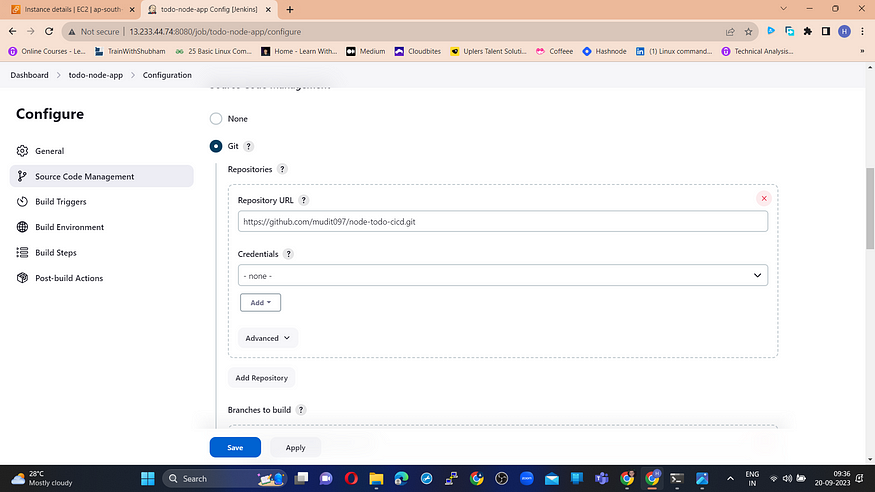
Scroll down to Source Code Management on the Configure page and paste the Repository URL and the branch your code is one. For me, it’s the master branch.
Since my repository is in a public branch, credentials are not required. I will explain in a later blog how to add credentials to Jenkins.
- In the readme file, the developer has given the commands that need to be run for the application to become running.
From that we can conclude that these are the criteria required to create a docker file:
-OS with NodeJS installed.
-Copy Code.
-Run the command npm install.
-Expose port number 8080.
- Command node app.js for the application to be run.
If you are new to the docker file, here’s my blog explaining a docker file and its format.
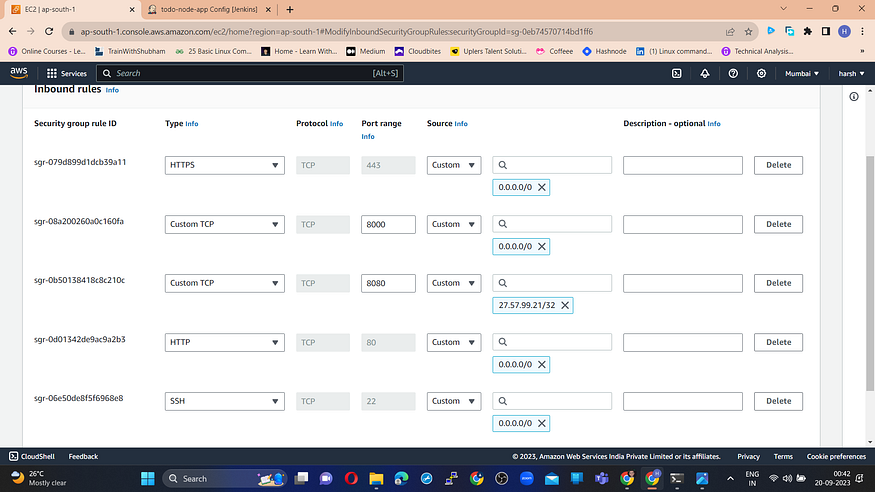
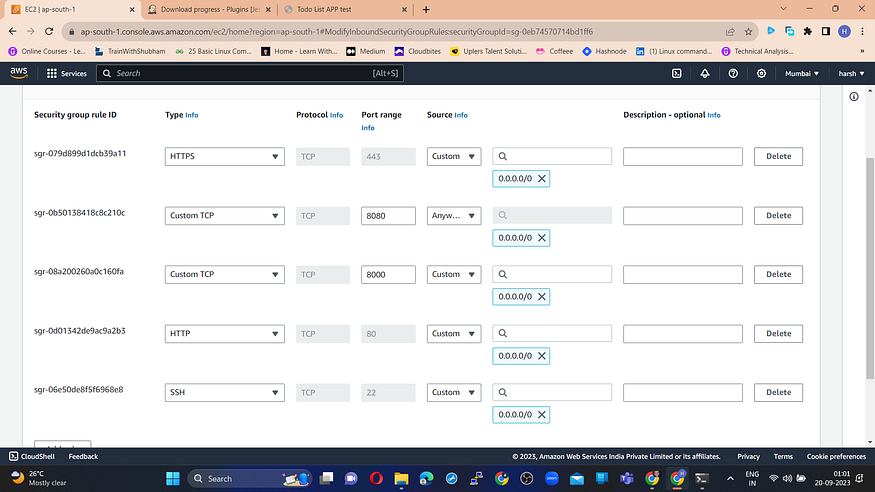
- Before that, open port 8000 to the world for your system as they need to access the application. Here you can observe that port 8080 is also opened to your system IP as it’s the port used to access Jenkins.
- Now in the host system, create a dockerfile.
sudo vim dockerfile
The dockerfile contents would look like this:
FROM node:12.2.0-alpine
WORKDIR /app
COPY . .
RUN npm install
EXPOSE 8000
CMD ["node","app.js"]
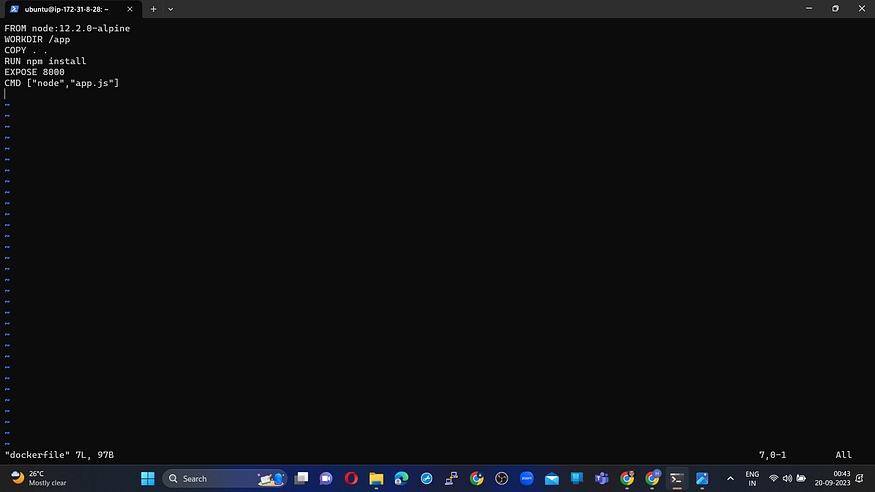
Save the file and exit, using the Esc button and typing:wq!.
- Now in Jenkins go to Dashboard > Configure > Add Build Steps > Execute Shell. In the Command section, type the following command:
sudo docker build . -t todo-node-app
sudo docker run -d --name todo-node-app -p 8000:8000 todo-node-app
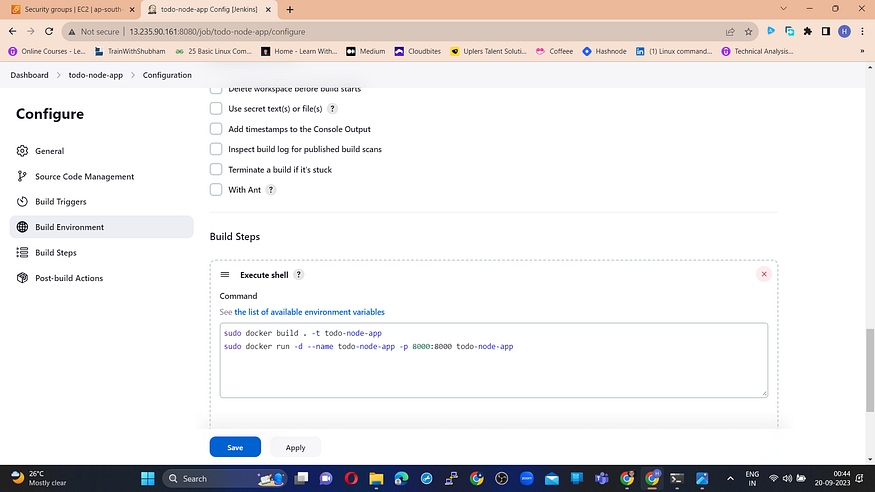
Save & Build.
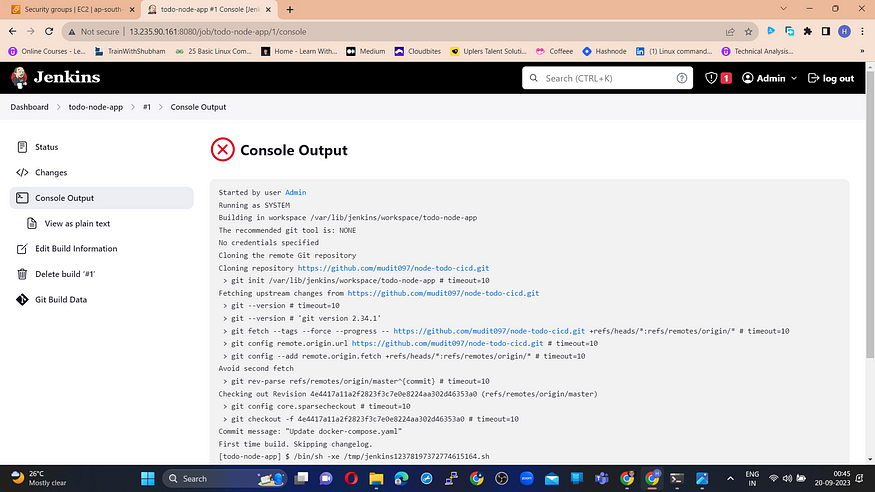
The build has failed as the daemon socket is unable to connect due to permission issues.

To fix this, run the following commands:
sudo usermod -aG docker jenkins
sudo systemctl restart jenkins
After you run the above commands, refresh your Jenkins dashboard and then try re-building it.

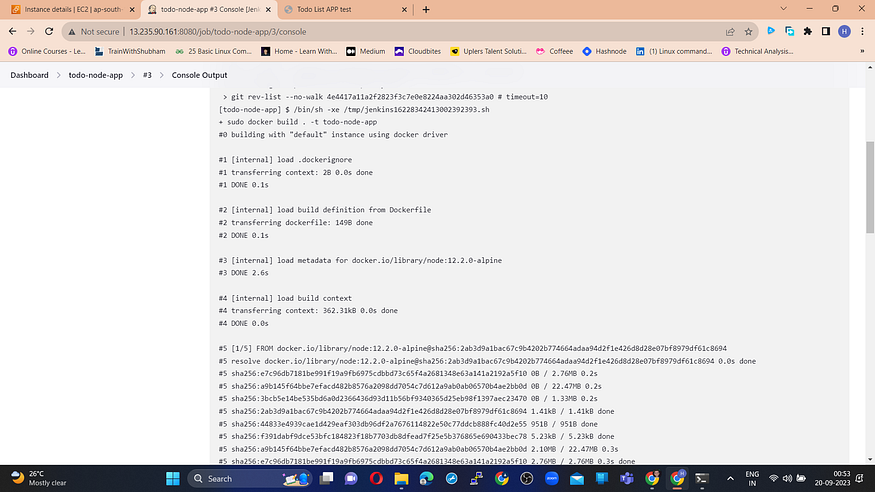
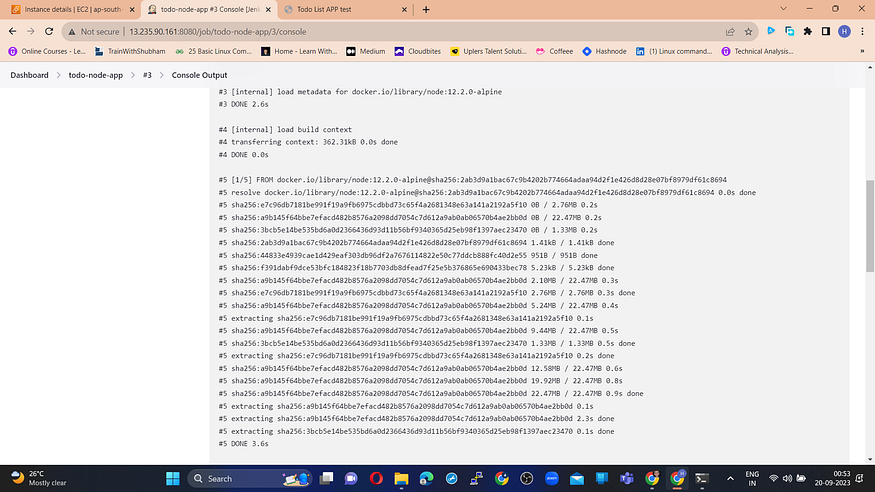
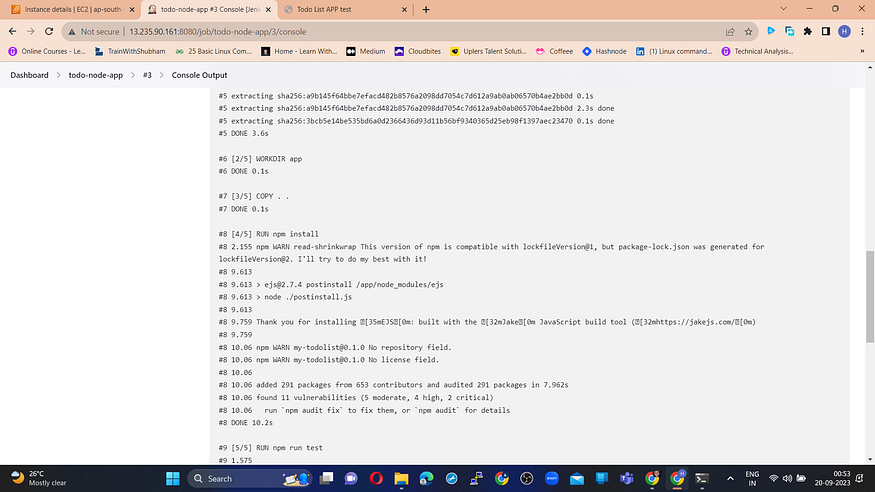
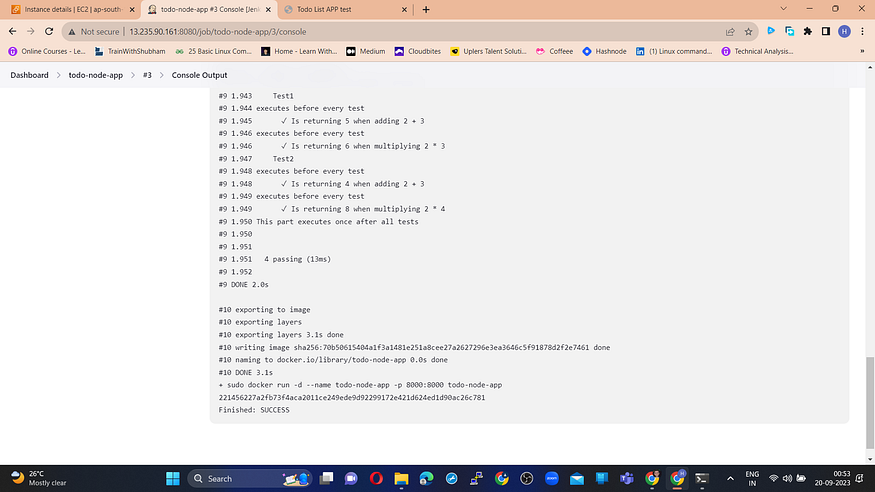
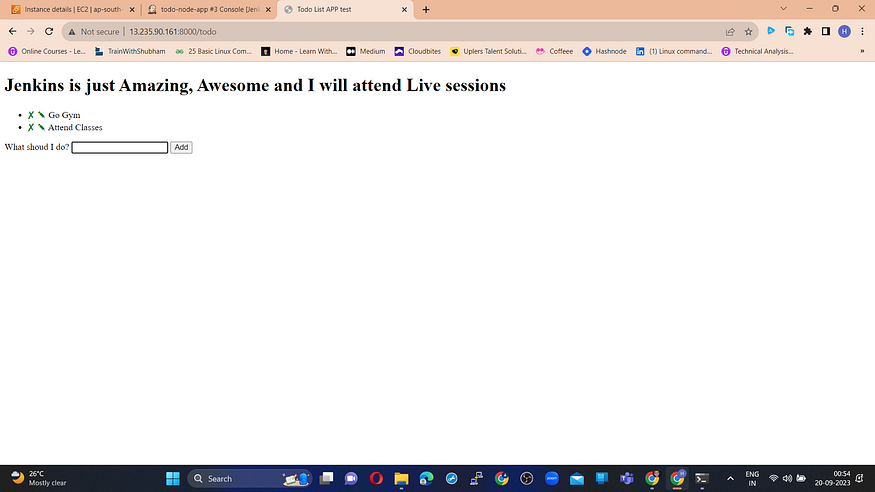
The error is solved. Job is successful. That means, the application is up and running. To access the application, use the following format of URL: public_IP_of_EC2:8080.
This would open the following page:
All this was done manually. Let’s automate this. We use Webhooks for GitHub for any events that take place in the repository, like a push or a commit. And Jenkins, as it is integrated with GitHub Webhooks, will automatically build the job.
Before that let’s install the GitHub Integration plugin in Jenkins, to integrate it with Webhooks. Go to Manage Jenkins > Manage Plugins > Available Plugins > Search for “GitHub Integration” > Select Install Without Restart
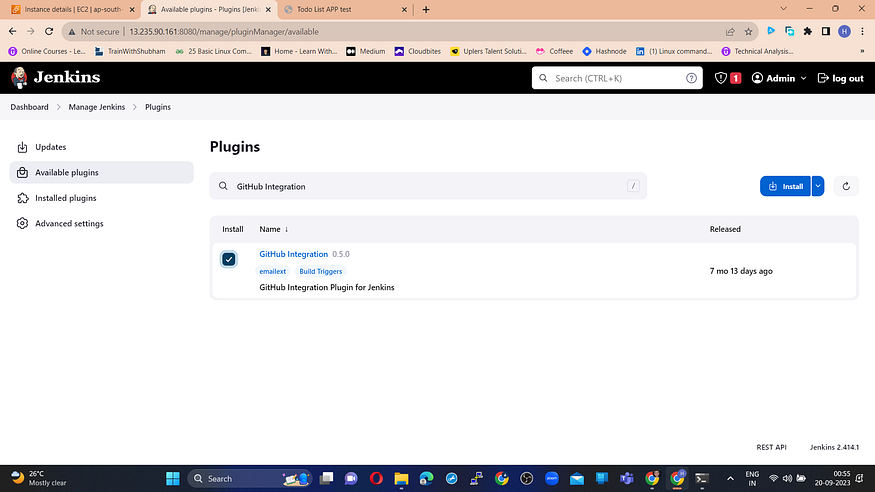
Once the Installation starts, select Restart after installation is complete and wait for the Jenkins server to come up after the successful installation of the plugin.
- In the AWS console, edit the Inbound rules of your host machine. Change port 8080 inbound rules from MyIP to Anywhere IPv4. We are enforcing this change as we need GitHub to access integration with Jenkins.
- Configure GitHub Webhook in the meantime. In the repository settings > Go to Webhooks > Add Webhook

The Payload URL will be in the format: jenkins-URL/github-webhook.
For example, my payload URL will look like this:

Change content type to application/json.
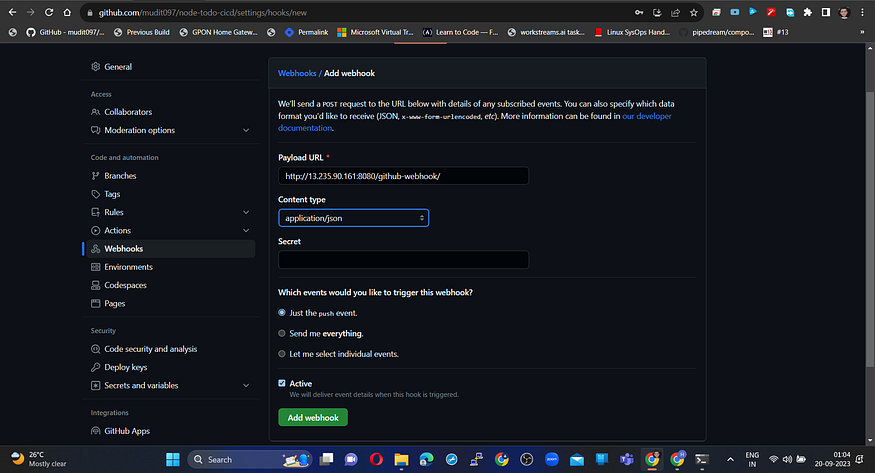
Select Just the push event and Active. Click on Add Webhook.
If the URL is correct and accessible, after a refresh of the page, a webhook will be successfully added. A green tick would appear, besides the payload URL, like the below picture:
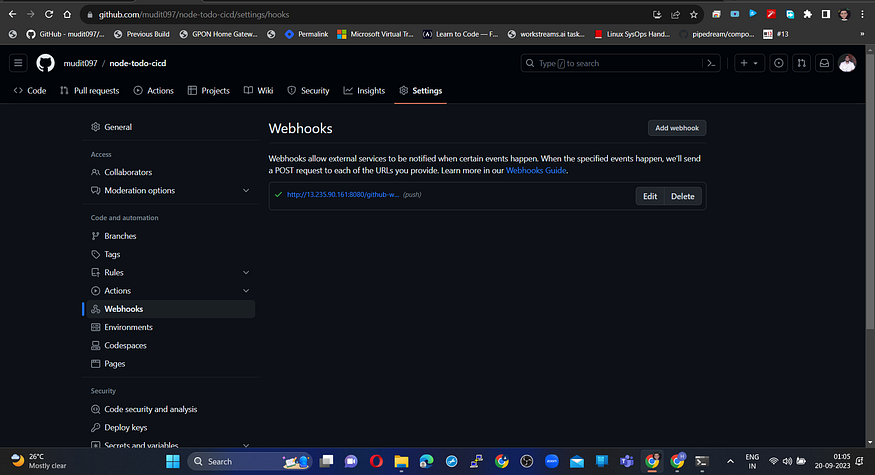
For me, Webhook is successfully integrated.
- Now go to Jenkins > Dashboard > Job > Configure > Build Triggers > Select “GitHub hook trigger for GITScm polling”
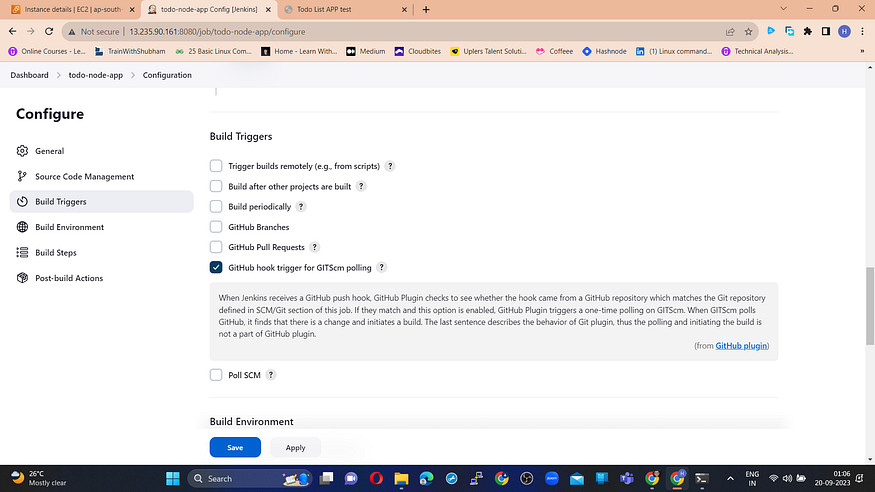
Click on Save. Now change the code in GitHub a bit to see if the integration works.
- To change the code go to repository > Open views > Open todo.js file > Edit line number 17 to “I am performing Jenkins with GitHub Integration! I am completing an End to End Projects!”
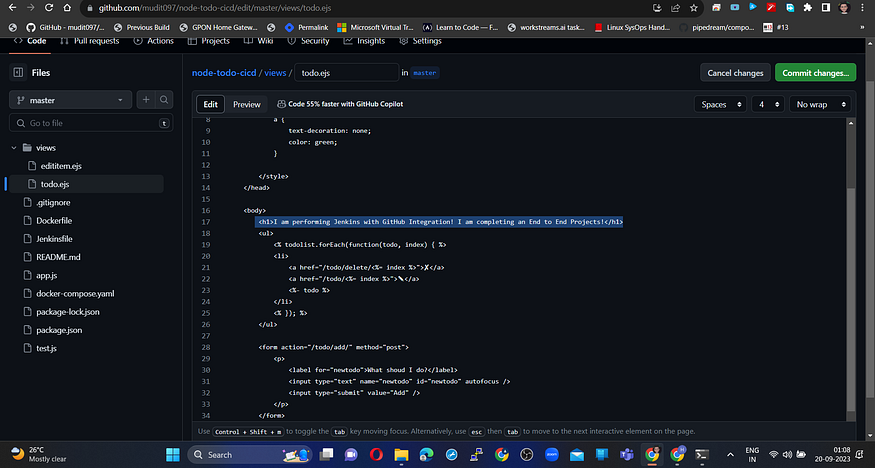
Commit changes.
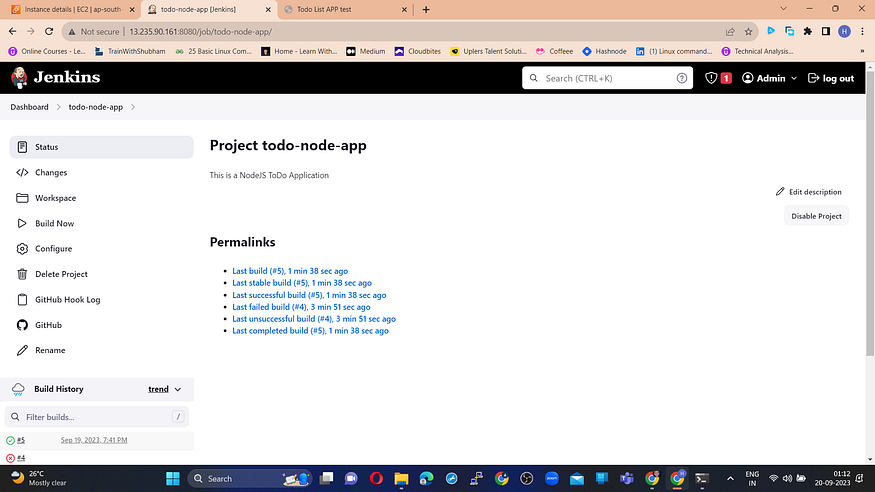
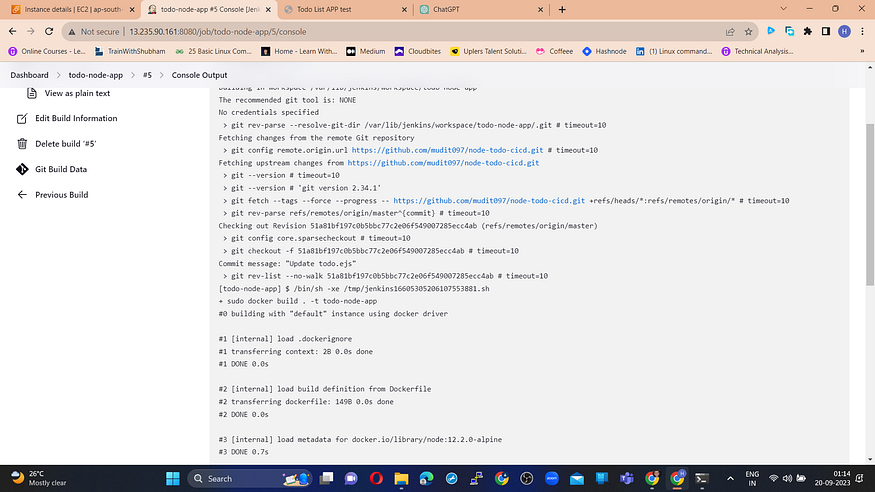
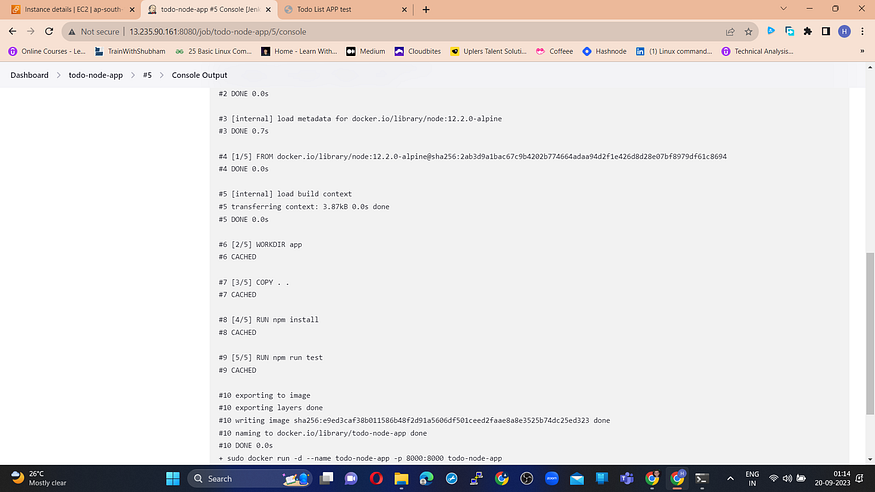
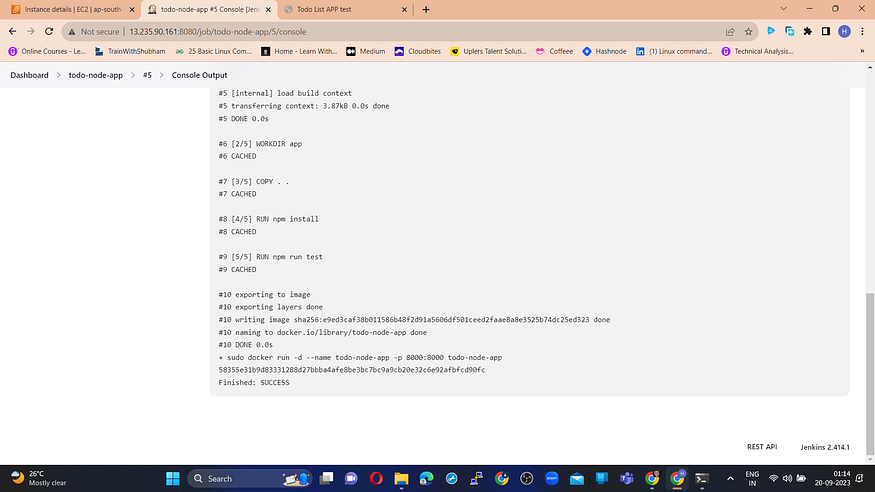
We can observe that Build number 5 started on its own.
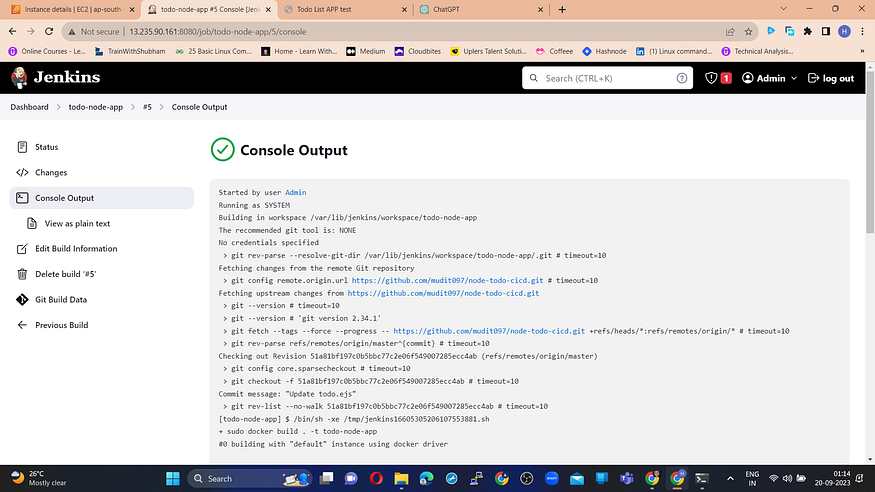

- We can observe the changes to the code we made by accessing the application:

2.2. Task 2: Run the application using docker-compose.
Make sure you have docker-compose installed in your system.
- Add a docker-compose.yaml file to your project.
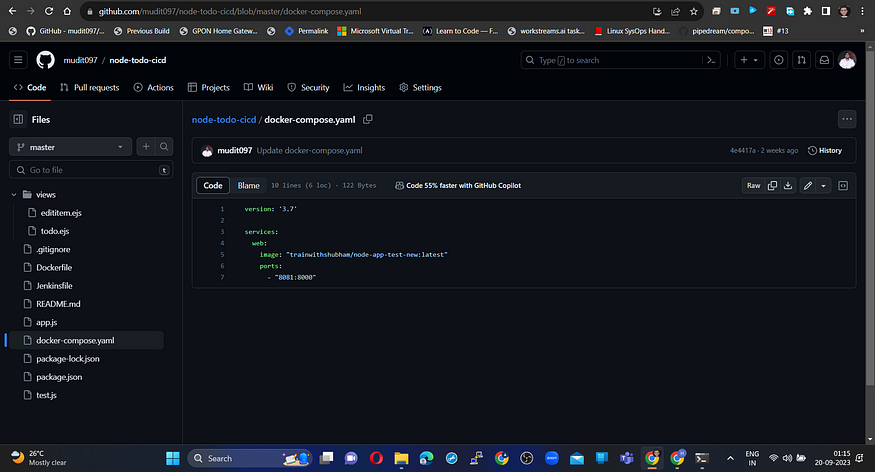
The docker-compose.yaml would look like this:
version: '3.9'

services:
  web:
    image: "trainwithshubham/node-app-test-new:latest"
    ports:
      - "8081:8000"
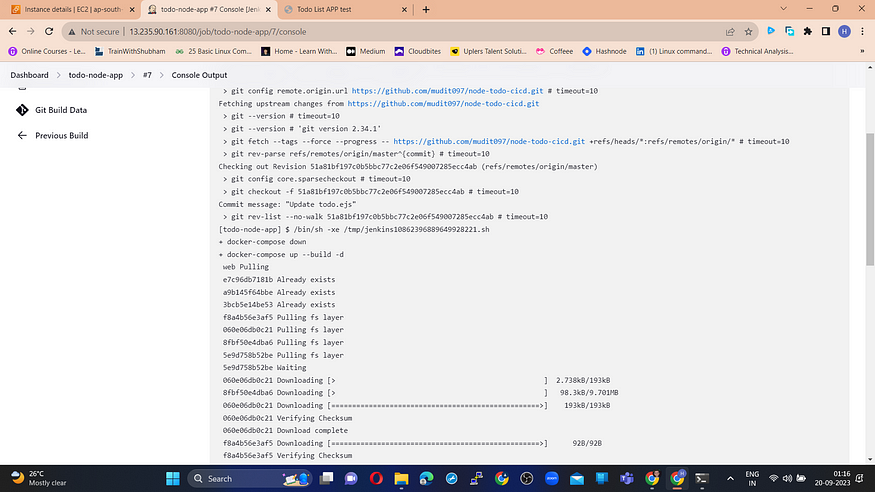
- In Jenkins go to Dashboard > Configure > Build Steps > And add the following commands:
Caution: Before going ahead with the build, make sure you delete the previous containers by using the docker kill command.
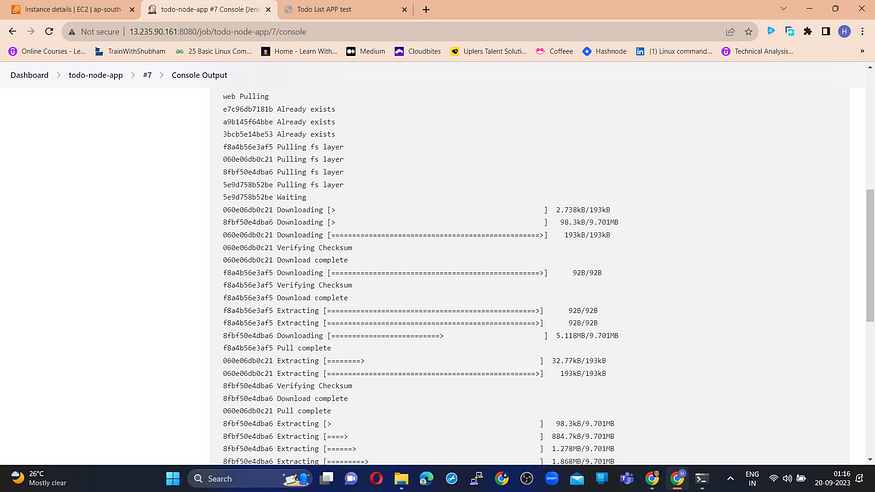
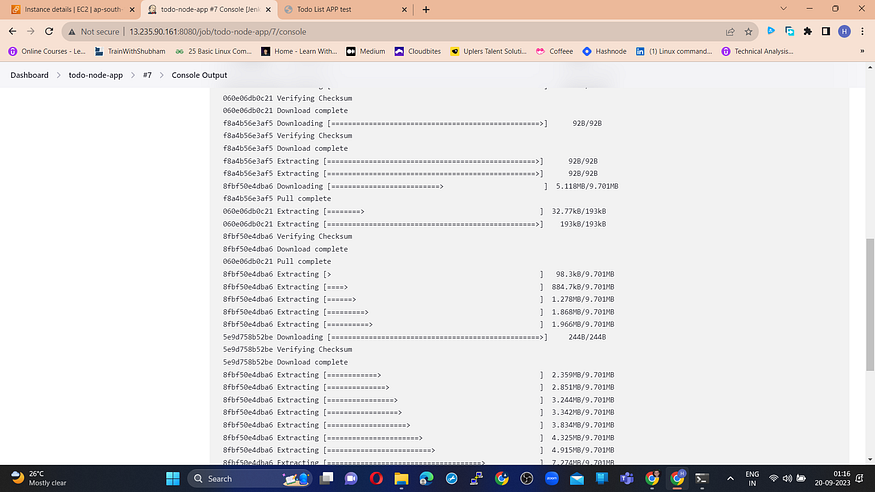
docker-compose down
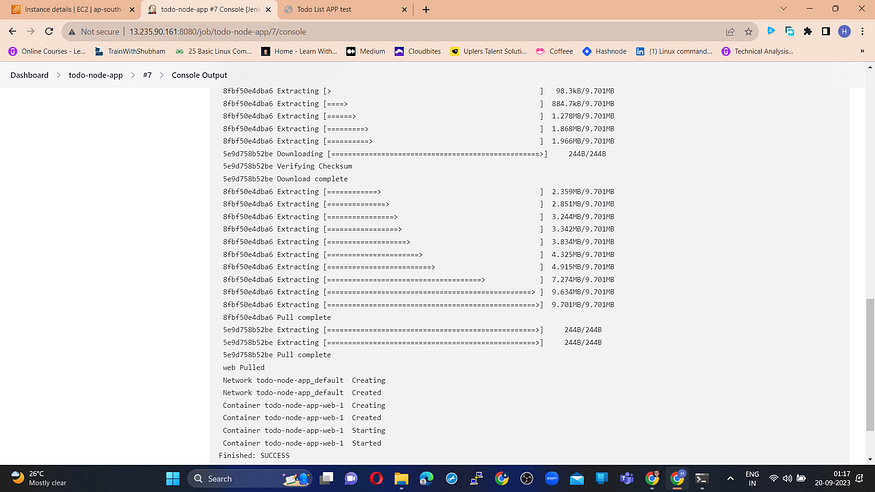
docker-compose up --build -d
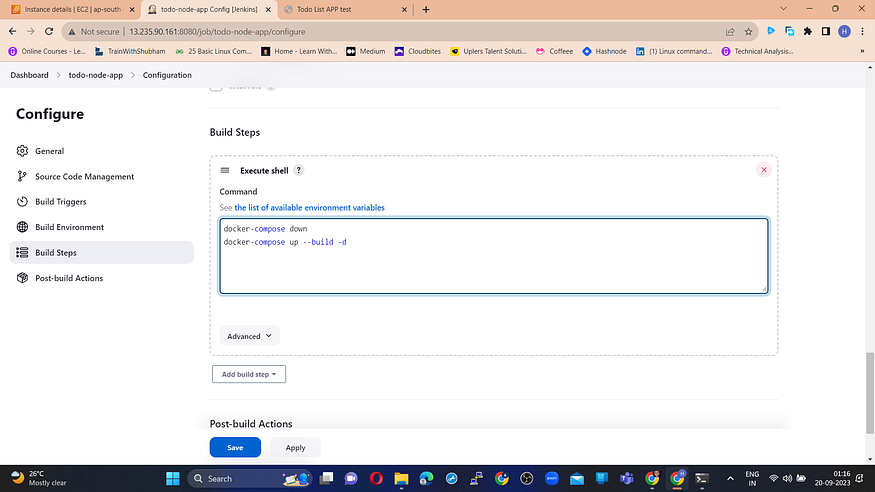
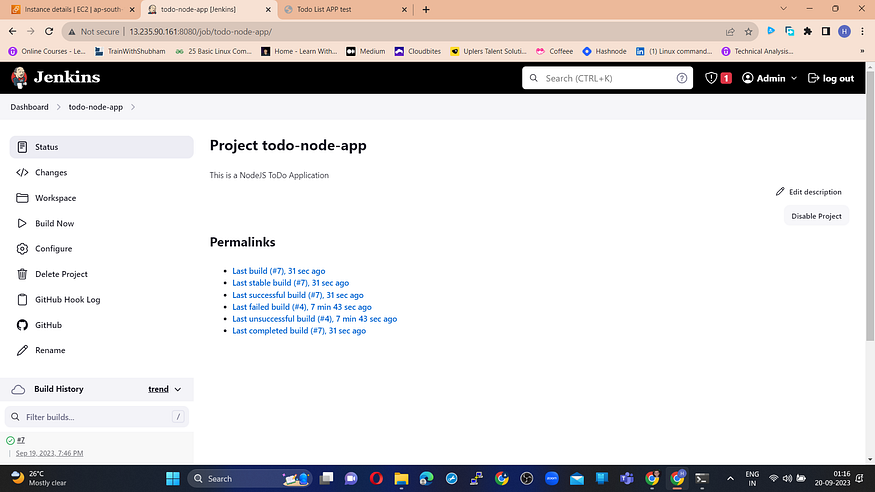
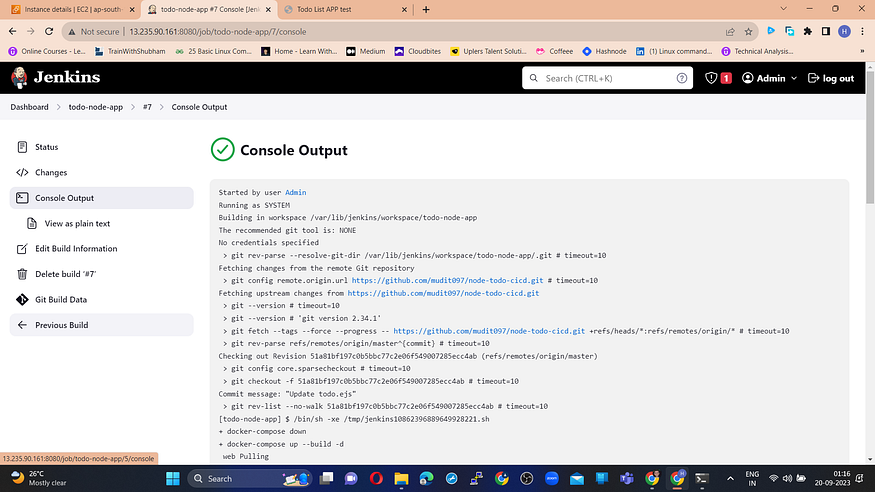
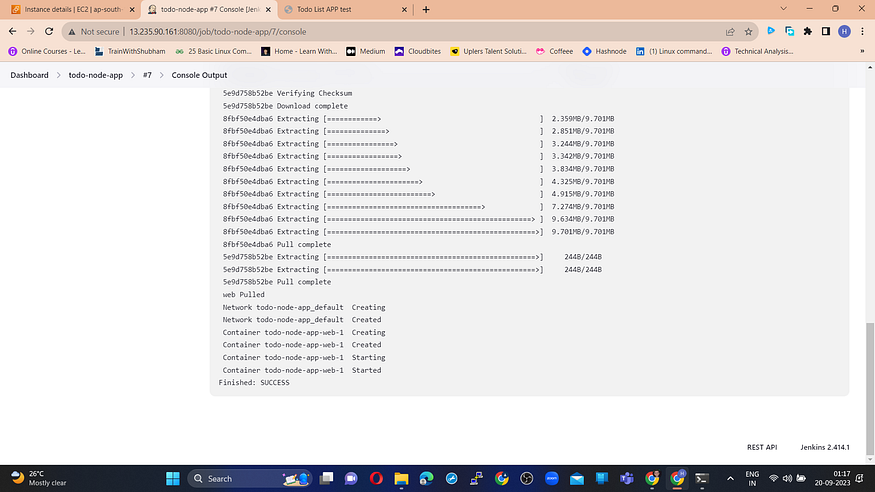
Save & Build. You can see that the build was successful.
Try accessing the application.

Yes ! My application is up and running.
We can see that the container is created by using the docker ps command:

In this blog, I have completed an end-to-end Jenkins CI/CD project to deploy Node JS using GitHub Integrations. Hope this helps you with your resume and learning. If you have any questions or would like to share your experiences, feel free to leave a comment below. Don’t forget to read my blogs and connect with me on LinkedIn and let’s have a conversation.